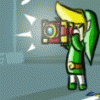
A fresh scan didn't eliminate the problem I had airbrushing this art, but may have shed a little light on the root of the problem. It seems that what looks white on the monitor is not necessarily white to the software, and painting over the two "whites" produces different results. In future, I'll have to make sure the image is bright enough, despite worries about washing out lines. In the meantime, I was able to overcome the problem by using the bucket fill and paint brush (as required) to level out the background white, and managed to finish airbrushing the piece. I think he came out pretty well ... though he may not be so sure.
Category All / All
Species Unspecified / Any
Size 1500 x 2480px
File Size 260 kB
A black layer in "soft light" or "grain merge" should readily simulate a much different brightness curve that highlights not-quite-white negative space. This all looks good (both technically and in terms of what my libido thinks) except for a small patch by his right foot. If you're using a white paintbrush over the lineart, you can Copy Visible (ctrl+shift+c in GIMP) to get a single layer that's exactly what you're seeing onscreen, then use that as a Multiply layer over your greyscale shading.
I'm not sure what software you're using, but in GIMP, the Levels tool (under the Colors menu) makes it very easy to stretch the darkest "whites" of the image to pure white, and the lightest "blacks" of the image to pure blacks. Only the bright areas really matter - your new computer seems to over-brighten nearly-white areas.
I'm not sure what software you're using, but in GIMP, the Levels tool (under the Colors menu) makes it very easy to stretch the darkest "whites" of the image to pure white, and the lightest "blacks" of the image to pure blacks. Only the bright areas really matter - your new computer seems to over-brighten nearly-white areas.
I had GimpShop while my old system was dying, and refusing to run Photoshop. It had some peculiarites I didn't like, though, and didn't do very good type font work. So I've reverted to Photoshop 5.5. In future, I think what I'll do is be more careful that my white background is really white, not just that it looks that way to me. I also wonder it was a good idea to brighten my monitor -- it might be masking minor variations of brightness.
Photoshop surely has the same functions, and in roughly the same places, with similar names. I just don't know them exactly. You're probably better off keeping your monitor wherever you feel comfortable, but tweaking the image brightness to double-check that all is well. Any kind of dark layer should help while you're erasing / whitening.
Not having Photoshop, but the tactic I use to deal with this "not quite white" problem is to use the magic wand tool to select the desired area, but turn its sensitivity way up till it only selects the exact same color it was clicked on. The areas of slightly-varying color will be outlined by the resulting mask (marching dots)
From there I'd paint over the offending spots, wand again and see if there were any spots I missed.
From there I'd paint over the offending spots, wand again and see if there were any spots I missed.
The beauty of my tactic is that it works regardless of monitor brightness. My application tells me the RGB values of the pixel directly under the current brush. I was moving the pointer across an area I thought was pure white, but then I noticed the numbers changing. Those spots were highlighted when I performed a magic wand selection with the tool set to only select the colors within one RGB point of 255,255,255 (pure white)

 FA+
FA+


Comments