 FA+
FA+
3145
Views
Views
57
Favorites
Favorites
Category
All / Fanart
Species Vulpine (Other)
Size 1205 x 1008
File Size 185.8 kB
Report this content
More from rhyfe2002


Check out my short animation test:
http://www.youtube.com/watch?v=lLe8lIql1Io
(Don't forget to set it at HD!)
Go here to download the rig.
http://dl.dropbox.com/u/16096979/kry_rig_1_0.rar
(Works in Maya 2009 or later ONLY!)
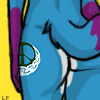
A Maya rig I did for the Krystal model from Star Fox Adventures (ripped by Gadonstriom), with help from The Setup Machine from Anzovin Studios. Besides the usual stuff (IK/FK switches, controllable stretch on limbs etc.) other things I added into the current rig include: Basic facial expressions, eyelids, controllable hair, and a dynamic/keyframe blend for the loincloth (trying to make it move realistically was a huge headache for me).
If someone would like to take over me, please feel free to do so; I'm pretty bad at rigging. XD
Krystal/Star Fox is © Nintendo.
http://www.youtube.com/watch?v=lLe8lIql1Io
(Don't forget to set it at HD!)
Go here to download the rig.
http://dl.dropbox.com/u/16096979/kry_rig_1_0.rar
(Works in Maya 2009 or later ONLY!)
A Maya rig I did for the Krystal model from Star Fox Adventures (ripped by Gadonstriom), with help from The Setup Machine from Anzovin Studios. Besides the usual stuff (IK/FK switches, controllable stretch on limbs etc.) other things I added into the current rig include: Basic facial expressions, eyelids, controllable hair, and a dynamic/keyframe blend for the loincloth (trying to make it move realistically was a huge headache for me).
If someone would like to take over me, please feel free to do so; I'm pretty bad at rigging. XD
Krystal/Star Fox is © Nintendo.
Category All / Fanart
Species Vulpine (Other)
Size 1205 x 1008px
File Size 185.8 kB


By the way, is there any chance that there's another model being used in-game? There's stuff that I can't seem to manipulate (e.g. eyes), which makes me suspect that this is a gameplay rig, and that they're using a different model for cutscenes. If there is, do you think you could possibly rip that one, as well?

The cutscenen model has the fur, but its' unusable in 3dsamx (skin is totally messed up)
And this for each layer of fur, when you know that there is 7 layers of fur, misplaced,
it's a nightmare you won't to cope with.
For the eyes, it's a texture thing! The eye image slide depending of where the eye looks...
And this for each layer of fur, when you know that there is 7 layers of fur, misplaced,
it's a nightmare you won't to cope with.
For the eyes, it's a texture thing! The eye image slide depending of where the eye looks...


Wow, that's quite an impressive rig!
Now excuse the noob question, but how am I able to select these black joints? I can only seem to move the hair and torso with the default selection. Is there a certain selection option I have to apply? Sorry, I never really delved into skeletons in Maya, but I'd like to try. ^^'
Now excuse the noob question, but how am I able to select these black joints? I can only seem to move the hair and torso with the default selection. Is there a certain selection option I have to apply? Sorry, I never really delved into skeletons in Maya, but I'd like to try. ^^'
Nevermind, just figured it out myself. Regarding the facial expressions, did you use blendshapes? I opened the blendshape editor and there seem to be some options, but the values are yellow and the sliders seem locked for some reason.
And jeez, this must have taken forever to rig. O.o
And jeez, this must have taken forever to rig. O.o
Yep, the facial blendshapes are connected to the head controller (the circle around her head), which is why you can't move them in the blendshape editor. You can control them by selecting the head control and adjusting the attributes that I added to it on the right; they should be relatively simple stuff like Eyes Happy, Mouth Frown etc. And yep, this took foreverrrrr. :D
Found some time to play around with this today, this is some pretty amazing stuff! :D
It took me quite a while to find all the right control points and make some quick selection sets, but I think that was a good opportunity to get a glimpse at the complexity behind this. Would be cool to have some furshading on this model but I think this would rocket up the rendertime too much. Maybe it's possible to apply a layer technique like they did in SFA. Makes me wonder where you got the model from by the way. ^^
It took me quite a while to find all the right control points and make some quick selection sets, but I think that was a good opportunity to get a glimpse at the complexity behind this. Would be cool to have some furshading on this model but I think this would rocket up the rendertime too much. Maybe it's possible to apply a layer technique like they did in SFA. Makes me wonder where you got the model from by the way. ^^
Thanks ^^ The model was ripped straight from the game by Gadonstriom; you can see him a few posts above yours. ^_^
And you probably don't need to use that ridiculous technique that they did; that was because of technical limitations. True fur simulation looks much better. :D
And you probably don't need to use that ridiculous technique that they did; that was because of technical limitations. True fur simulation looks much better. :D
Definitely! I've put together a lenghtmap for the fur as well as a slightly improved bodytexture (with better eyes). Thought I'd share that one here...
http://img718.imageshack.us/img718/4463/furmap.jpg
http://img80.imageshack.us/img80/6519/krystalm.jpg
Also some test renderings with the fur...
http://img41.imageshack.us/img41/6157/kickjp.jpg
http://img220.imageshack.us/img220/3617/kick2.jpg
http://img23.imageshack.us/img23/2706/kick3i.jpg
http://img51.imageshack.us/img51/1844/kick4.jpg
Works great for martial art stuff! :D
Ooh, that looks nice! I see you upped the resolution of the texture map to 2k, how did you do that? O.o
I don't understand why you changed the color of the texture though o.O She's like... light aqua blue now? ^^;
And the fur looks awesome! Might need some additional mapping for gradients especially around the edges of the clothes, but looks real good ^^
Mind passing on your stuff to me? XP
I don't understand why you changed the color of the texture though o.O She's like... light aqua blue now? ^^;
And the fur looks awesome! Might need some additional mapping for gradients especially around the edges of the clothes, but looks real good ^^
Mind passing on your stuff to me? XP
Hey there! Sorry for not being around for a while. I recently moved and had to catch up with a lot of work so I kinda lost track of this.
Sorry for the color change, I was toying around with different colors and must have forgotten to change it back to the normal color.
We're currently testing a new Maya render plugin called Furryball where I work and in order to give it a little test drive, I decited to use your Krystal model and fancy it up for that purpose. I've been working on it this week and have changed a few things which include movable pupils, mouth details, fully detailed body fur and other facial details like that thingy on her head which was just a texture first. Some of these elements where basically copied from the other Krystal model that is available online. I first wanted to do a lipsync test, but I really suck as an animator (I'm rather responsible for light, shading and post), so I came up with something else to test eye movement and general animation.
Here are some of the current results.
Updated model: http://img34.imageshack.us/f/krystalupdated.jpg/
Still from a short CGI test I'm working on: http://img33.imageshack.us/f/krystalb.jpg/
I want to get everything done this weekend and will also share the updated model with you. I still need to clean up the scene a little and do some optimizations. In order to see the fur you'd need the Furryball plugin for Maya by the way. It's one incredible GPU renderer that renders fur and other great features in no time. The only thing you'd need would be an up-to-date graphics card with DirectX10 support. I can only recommend it! ^^
Wow, that looks so much better than the version I'm trying to do now (Adding nCloth and using the default Maya Fur stuff, basically), and the eyes look really nice ^^ My only real complaint is that it's starting to look a bit TOO realistic, especially with the new eyes - Personally, I'd prefer keeping the whole cartoony look they had going in SFA... but well, you're the one making the changes so I can't really complain :P
If you can get the model out to me that'd be really awesome. Can't wait to try animating it ^__^
If you can get the model out to me that'd be really awesome. Can't wait to try animating it ^__^
Thank you! I was first using the usual Maya fur as well, but the rendertimes with Mental Ray where unbearable, even though I'm on a new quadcore i7. The eye texture will be included, so it won't be a problem to change it at any given time. I basically took the first best result that popped up on google. The updated model will be done soon, I'm currently making it a little more user friendly with an additional face section set where you can control eyes, mouth movement and everything you've made possible there. nCloth would be a great idea by the way! I first tried out dynamic fur on the tail (it didn't make much sense on the body, so it's just static there), but just couldn't get the dynamics right. Maybe you'll succeed there. XD
Yeah, I think I can work on the eye... it should be easy enough for me to retexture a version similar to the original. I think nCloth is also great. not just for the loincloth but the hair as well... I tried using the normal hair dynamics and it didn't turn out so well, but nCloth actually seemed to work relatively okay. I think having dynamic fur on the body would be good, too... it might be a little weird to have it static. Problem is I don't exactly have access to the plugin... is there any way for me to get it?
It's fairly easy to get it actually if you look around on the internet a little. ;) There's a 14 day trial as well if you register in their official forum. We've got a commercial license of the plugin where I work, but in order to use it at home I've got a "different" one on my personal computer. Like I already said, the plugin is perfect for fur rendering. It easily renders a 1080p image with Multisampling, 4xSupersampling and lots of fur in just a couple of seconds while it takes Mental Ray more than 15 minutes at almost the same output quality. Apart from that working becomes much faster if you're able to see everything in realtime.
I've tested out dynamic fur on the body, but even at full 1080p output the results where practically the same as with static fur. It's barely possible to tell the difference since the fur is just too short for that purpose, so I thought it would be a waste of computing power. I figured that the dynamic fur would make sense on the tail whatsoever since it's much longer than the body fur there. I'm still working on getting the physics right. I looks pretty good so far, I'd recommend to smooth the polygons before rendering though since the edges would otherwise be visible in the tailfur.
I've tested out dynamic fur on the body, but even at full 1080p output the results where practically the same as with static fur. It's barely possible to tell the difference since the fur is just too short for that purpose, so I thought it would be a waste of computing power. I figured that the dynamic fur would make sense on the tail whatsoever since it's much longer than the body fur there. I'm still working on getting the physics right. I looks pretty good so far, I'd recommend to smooth the polygons before rendering though since the edges would otherwise be visible in the tailfur.

Alright mate, there you go! :)
http://www.megaupload.com/?d=HDAP4BAF
There's a readme file that contains a changelog. I'm currently sending the animation test I did with her to the Krystal archieve for uploading so it should be there soon as well. ^^
http://www.megaupload.com/?d=HDAP4BAF
There's a readme file that contains a changelog. I'm currently sending the animation test I did with her to the Krystal archieve for uploading so it should be there soon as well. ^^
Did you get my PM? :3
Here's the animation test with the updated model I was talking about earlier. http://www.youtube.com/watch?v=k8nKNEW4oew
Here's the animation test with the updated model I was talking about earlier. http://www.youtube.com/watch?v=k8nKNEW4oew
Hey Rhyfe! I've been trying to make some further improvements on the model lately and tried to add some new blend shapes for some more facial animation. I've been creating these on the geo_main_body model and added them to your already existing blendshapes named blendShape2. The problem is that everytime I place them before the skeleton (so they still get affected by it) the polygons screw up big time. Is there any special method you used to create your blendshapes? Or is it impossible to add new ones after a character is rigged?
I think you should do that since you did the biggest part on it. Maybe we can merge our updates together later on, I've been mainly working on facial detail and shading. Right now I'm trying to make her ready for lipsync stuff, but obviously with some issues. I think I finally found the problem by the way. Since I've been using custom mouth parts I had to delete the super low poly teeth and tounge by removing the polygon faces in the main model. I've just tried to create blendshapes on the 1.0 model and it worked just fine. After removing the faces the model always screwed up when adding blendshapes. Can you think of any other methods to remove the faces without getting this issue?
Here's what the model looks like so far from the progress I made: http://img26.imageshack.us/img26/48.....stalnature.jpg
Did you have any success with ncloth? ^^
Here's what the model looks like so far from the progress I made: http://img26.imageshack.us/img26/48.....stalnature.jpg
Did you have any success with ncloth? ^^
Yup, I think it's been working fine, so far, with the default setups.
I think the model looks great so far, although I'm a bit on the fence when it comes to smoothing her model, especially the edges of her cheeks and the tips of her ears. The sharp edges are probably part of the design, so if possible I would prefer to keep it that way.
Did you add/remove any extra polys to the mesh? That might screw blendshapes up if you did that after the rigging... but you probably knew that already.
As for how I assigned my blendshapes to the head controller... I just added the attributes to the NURBs curve, then linked them together with the Set Driven Key function. Normally I'd set it to overshoot by 200% so that I can push the shapes further if I wanted to.
I hope you're doing the phonemes for her facial features... it'd be cool to make her talk :P (In fact I was wondering if you could set up a scene for me in which to animate in... I have zero experience in creating environments, LOL)
Yes, it's definitely caused whenever I add/delete polys from the mesh. I found a workaround by making a quick selection set for the certain polys that need to be removed, with that I can remove them once I make renders and leave them there while working on it. For smoothing the model I'd just use the smooth polygons command everytime before rendering.
I've created some various new lip expressions that include closed and open lips, as well as forming an O with the mouth, tongue can also be animated now, so she should be ready for lipsync. \o/
Furthermore I've added some new facial expressions like a skeptic looking raised eyebrow and the ability to control her eyelids a little. I've rendered a little test video that shows some of these features: http://www.megavideo.com/?d=YR4AU213
I could hand over the mall scene environment I used for the earlier test video I showed you. It's pretty much ready to go for rendering... well, for Furryball at least. Speaking of which, did you get it to run?
Oh, the one problem I have with nCloth is that it drives the polygons directly instead of through a curve deformer like the hair dynamics I used in v1.0, which means I can't blend between manual and automatic control any more... :/ Hopefully it's good enough that I can make it fully automatic without needing to touch it ever again.
Yup, you do. I believe there's an attribute somewhere... on her waist maybe? ... that lets you toggle between pure dynamic, pure manual control, or a blend of both. Always set it to static first, when you animate: you can't just scrub through or the dynamics won't be accurate (i.e. you'll see it jump all over the place). After you finish animating, you can use the cache to temporarily bake the dynamics to the curves, allowing you to scrub and preview the dynamics through the timeline.
Do note that it's pretty limited, though: it's liable to screw up in more complex poses, and it's prone to stretching unrealistically as well... which is why I'm switching to nCloth in my next version. :P
Actually, if I sent you my new version, would you be okay with implementing all your new features on that instead? That would probably make things easier for us in the long run. :D (I sure hope you referenced the rig for your animation...)
Oh I see, I guess I missed that then. It shouldn't be a problem to implement the new features to your model if you send it to me. I just hope the new blendshapes are still going to be compatible since redoing them would be quite a lot of work. I've only shown this animation to you and don't plan to post it anywhere else since it was just done to show the new facial features to you. Once the 1.2 model is finished I'll probably do a new facial animation test and reference everything. You could probably include it into your submission then to showcase what the model can do. :)
Thought you'd be really interested to see this new blend shape: http://img835.imageshack.us/img835/.....1/eyeblink.jpg
Took a lot of time tinkering around with the polygons. The result isn't perfect, but probably more usable. :)
Took a lot of time tinkering around with the polygons. The result isn't perfect, but probably more usable. :)
I know, their missing support for point light shadows is driving me nuts. They're going to release a new 2.0 version soon which will hopefully be better. Can't wait to see the new eye texture. I hope you're working with your model, since the 1.1 model has different polys which makes it unable to add blendshapes later on.
Hey Rhyfe, no need to redraw her eye texture anymore, I've created a physically modelled eye with blendshapes for her pupil size. This time it's also positioned correctly unlike the old eyeball which was completely inclined.
I didn't like the realistic look either. This time I worked with eye references from the character and modeled the scales correctly. Since the eyeballs are phisically modelled I was finally able to get that Pixar-like shiny crystal eye effect, looks really neat! I'll give you some pics soon. I've redone the furmap as well with references this time. All in all she looks a lot more like in Adventures and more comic like with these new changes, I think you'll like it. :)
I didn't like the realistic look either. This time I worked with eye references from the character and modeled the scales correctly. Since the eyeballs are phisically modelled I was finally able to get that Pixar-like shiny crystal eye effect, looks really neat! I'll give you some pics soon. I've redone the furmap as well with references this time. All in all she looks a lot more like in Adventures and more comic like with these new changes, I think you'll like it. :)
Okay, no problem! Getting the ncloth stuff would be great, the facial features are basically finished now. The last thing the could use some shape is the rest of her body since it only has these flat clothing textures. I wonder how Littledragon did his clothing, I played around with ncloth but found it quite hard to handle, it always screwed up.
He built and textured his model from scratch so it is easier for him. The best we can do is to make the textures better, if we're working with the original model. Anyway, the only thing I'll be turning into an nCloth is her loincloth and maybe hair, since those are the only things that move outside of limbs, eyes etc.
Hmm, maybe I'll ask him if we could use some of the clothing he made for his model. It just looks a lot better if it's 3D modelled. Here are some tests with the new eyes and fur by the way. Eyes still need some specular reflection, apart from that they're pretty good so far. The colors of the iris, pupil sizes as well as the shinyness is adjustable.
http://img585.imageshack.us/img585/.....eyesandfur.jpg
http://img585.imageshack.us/img585/.....eyesandfur.jpg

Hey Rhyfe,
I'm about to clean up the new model right now but can't get around a few issues. While your blendshapes only deform facial regions my new ones deform some body parts as well since I slightly altered the geometry. Can you tell me how you made your blendshapes only affect the facial region? O_o'
Probably doing a version with Mental Ray shaders as well, but at first I need to get rid of the bugs.


I hate to be the kill joy in this conversation but I spy a small error that the ripper forgot to acomidate when he packaged this model. its flipped a crossed the X axis (left/rite). the GameCube rendered its scenes wierd and when the geometry and textures where in memory they where flipped. one of the post process cycles the GC had reserved for effects was dedicated to flipping the frame back when it was pushed out to the TV.
thankfuly in 2k9 they had rigging tools for replacing geometry without affecting the vertex weights called [drum roll while I go check] Skin>Edit Smooth Skin=Subsitute Geometry Options. the Geometry could be: copied, flipped and its history and transforms deleted and then reapplied to the rig, no harm no foul.
brought me to this conclusion was a subtle detail of the character that I've burned into memory (because her hair always drives me insane when I model) the part of her hair is flowing to the wrong side...
Interesting... I wonder if that could be why Maya Fur didn't seem to work properly. Hmm! In any case, I think it's a small problem that doesn't really need a fix ^^ Substitute Geometry didn't quite work properly either, I tried before and it just screws everything up XD
on the subject of fur, in my experience if you are attempting a [texture] map based approach the character usually has to have 1:1 unique texture space with no overlaying UVs. it can be done with multiple pieces or even separate UV sets but more often than not the best approach is usually to knuckle down and make the texture space dedicated. just screwing around with a character back in o-10' I threw an automatic map onto the mesh and then baked the textures over into the 1:1 space and started painting. I never really completely understood texture based fur flow but I've seen it done. Though all things considered with this model it really is a gimick to sell when packaging the model. the geometry of the character is to low to really take advantage of it and there is no clear topology difference between what is supposed to grow fur and whats not, I.E. cloths...
I digress though, furry Krystal would be a fun thing to screw around with ^.^
I digress though, furry Krystal would be a fun thing to screw around with ^.^
This is actually an outdated version of the rig: Here's the latest one so far - http://files.krystalarchive.com/Gre.....al_Rig_1.4.zip
You can import the model itself into Blender, but not the rig - It's way too complex for that. Maya isn't free usually, but you can download an education version that has a few limitations.
You can import the model itself into Blender, but not the rig - It's way too complex for that. Maya isn't free usually, but you can download an education version that has a few limitations.

Apparently I missed out an uppercase letter: http://files.krystalarchive.com/Gre.....al_Rig_1.4.zip
I tried downloading it myself and opened it in WinRAR, seems fine.
I tried downloading it myself and opened it in WinRAR, seems fine.


Comments