 FA+
FA+
5112
Views
Views
162
Favorites
Favorites
Category
Photography / Tutorials
Species Unspecified / Any
Size 1200 x 1261
File Size 1.19 MB
Report this content
More from MordrudesMonsters


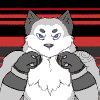
Official Mordrude's Monsters Duct Tape Dummy Tutorial part 1
This is the OFFICIAL Mordrude's Monsters DTD tutorial. This is how I would like all of the DTDs done by my commissioners.
YOU WILL NEED:
2 rolls of heavy duty duct tape, 55-60yds each.
3 heavy duty trash bags, preferably 3mil thickness. I used Husky Contractor Clean-up bags.
Strong scissors for cutting your bags and removing your person.
DO NOT SKIMP ON MATERIALS HERE, FOLKS. The duct tape was about $11, and the whole box of bags was $16. We're talking about thousands of dollars worth of fursuit being built from this base, cutting $10 off the cost of materials isn't worth the potential for catastrophe!
Plan on taking up to three hours if you are doing this with one taper. These can be very hot and uncomfortable, stay hydrated and take frequent breaks if needed. More tapers means faster taping, but can also mean more chance for error.
PLEASE GO TO THE BATHROOM BEFORE STARTING! Even if you don't think you need to go, try. Once you start, you're stuck in it until you're done!
Part 2 | Part 3 | Part 4 | Part 5 | Part 6 | Part 7
The full tutorial can be found on my website.
Did you find this tutorial useful? Want more tutorials? See my monster list of tips/tutorials! If you want even MORE tutorials, help fund my start-to-finish tutorial book on how I make my costumes!
Category Photography / Tutorials
Species Unspecified / Any
Size 1200 x 1261px
File Size 1.19 MB

I'm holding a fursuit panel at a convention here in sweden, would you give me permission to use this tutorial in it? As in, I will print it out and attach the sides together in a tutorial sheet. I will of course print out your FA studio name, website and such, so it's like free advertising.
Would you give me permission for this? :) I would have to remake into white background and black text to save ink, but that takes me only a few minutes to modify myself, with your permission.
Would you give me permission for this? :) I would have to remake into white background and black text to save ink, but that takes me only a few minutes to modify myself, with your permission.
Excellent, my home con is in September, so having a spring con to go to is better than trying to jam two in back to back like I'd have to with Scotiacon and Rainfurrest. I hope you guys succeed! Let me know if there's anything else you would like to use as far as tutorials, I made them to be shared and I'm more than happy to do so.


With tape! Just tape the top shut like a belt, and work your way up.
I just made myself a new one yesterday, and I can give a few new tips! I found it was easier to get the crotch area as tight as it should be by taping up both legs, cutting the bags all the way through at the top, and using an extra strip of bag to cover the gap. It lets you keep the taped plastic closer to your body, and that's really really crucial for a good fit with good range of motion. Also, it helps to run the bags up around your neck by about an inch, like a short turtleneck, to show how far to bring the bodysuit up on the shoulders to prevent gapping.
I just made myself a new one yesterday, and I can give a few new tips! I found it was easier to get the crotch area as tight as it should be by taping up both legs, cutting the bags all the way through at the top, and using an extra strip of bag to cover the gap. It lets you keep the taped plastic closer to your body, and that's really really crucial for a good fit with good range of motion. Also, it helps to run the bags up around your neck by about an inch, like a short turtleneck, to show how far to bring the bodysuit up on the shoulders to prevent gapping.

This is my old version! Please use the new version here: http://www.furaffinity.net/view/14987958/ It has more detail and is more effective.
You want to have the legs taped up all the way to their very top and then tape across the pelvic region, keeping the tape as close to the body as possible. Try to keep the pelvic region panel as wide as your body allows, it should look similar to the bottom of this: http://ak1.polyvoreimg.com/cgi/img-.....id/3178248.jpg
If you finish a translation, would you allow me to post it? I would like to help as many people as possible with my tutorials.
她说做图案,想象泳衣这样的( http://yajomia.com/wp-content/uploa.....e-Swimsuit.jpg )在底部一块布料之间大腿使它非常接近皮肤像紧身的衣服。没有使不舒服!
Comments