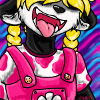
Cool scratch-art-like effect I discovered...
15 years ago
Ever seen those scratch-art things with black paint over a rainbow background, where you etch a picture into it?? You can imitate that in GIMP! Here's how:
- Take a black(ish)-on-white(ish) lineart (like pencil/pen) picture. (White-on-black would work too, just skip the first inversion step.)
- Paste it into GIMP.
- Invert its colors. (MENU > Colors > Invert)
- Add a new layer. (Open a layer dialog, click the "new" icon.)
- Put the new layer on the bottom. (Layer dialog, down arrow icon.)
- Hide the picture layer. (click the "eye" for it in the layers dialog.)
- Click the second layer in the dialog, so you can use it.
- Select the "Blend" tool. (Boxy icon next to the paint bucket icon.)
- Select a rainbow gradient.
- Run a line diagonally across the entire layer, to fill it with a diagonal gradient. (Bonus: Try setting the gradient shape to "Spiral" and drag from the center to the edge. It makes it even more cooler looking.)
- Unhide the top (picture) layer.
- Add a layer mask. (MENU > Layer > Add Layer Mask) (Select "Grayscale copy of layer" and check the "Invert mask" checkbox.)
- Flatten the image. (MENU > Image > Flatten Image)
- Save the image. (Preferably as a PNG file. GIF limits you to 256 colors, and JPEG flat-out butchers the image quality.)
- Enjoy! ^_^

 FA+
FA+
