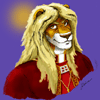
All right, here's another collage of in-progress shots, illustrating the working process for my latest painting, from start to finish, along with some comments about each stage. I'll try to make this a little longer and more elaborate than the last, and thus, ideally, more useful... Or so I hope. Here we go:
First of all I had to decide on the reference picture for my painting. There were several others I considered, but in the end I chose this one, since it's a nice and simple close-up. There is no background, or any other distracting elements, so I knew I'd be able to focus on the actual portrait - And I'd get a chance to play around with detailed skin and hair textures some more. :P
Here is a copy of the original reference image as I found it: http://img.photobucket.com/albums/v.....14aaaaaaa1.jpg
Once I had my reference, I loaded it up in Painter and tweaked its colours/ contrast, sharpened it and generally did what I could to optimize it for my purposes.
When I was satisfied with it, I did a basic line drawing, to nail down the major shapes and proportions, and then finally started painting.
First I blocked in the basic tones and lighting, for the most using fairly big and bold brushes. I work at about 25% or less of the actual full resolution at this point, which makes it easier to focus on the essential elements of the painting. If you lay down a solid foundation, right from the beginning, it just makes the later steps easier. ( image 1 )
I defined some of the shapes and edges some more, then switched to a blender, to soften out any unwanted rough edges and create smoother transitions. The blender I used also had the positive side-effect of creating some basic grainy texture. ( image 2 )
I then switched to a camel hair brush and applied some basic texturing to his hair and beard. ( It may appear obvious enough, but that type of brush is quite effective for creating detailed hair textures, since it allows you to paint multiple fine lines in one brushstroke. )
Then I switched to a chalk brush, and applied more texture to his skin, as well as his clothing. ( image 3 )
These textures add a great deal of realism already, however he still looks rather messy - Time to clean him up a bit. I switched to a smaller brush and re-defined the various edges and shapes, generally adding more detail and contrast. ( image 4 )
After that I switched back to a smaller blender brush, getting rid of any unwanted rough spots and edges. Then I applied yet more detailed, sharper textures, this time paying more attention to detail. ( image 5 )
At this point the major part of the work is done, and it mainly comes down to adding final details and cleaning things up as necessary. This is where I zoom in to define the facial features further, add more subtle skin detail, strands of hair and so on... ( close-up )
Once I'm satisfied with what I got, I usually tweak the colours, contrast etc. one final time, then merge any layers if necessary, and scale the painting down for web use - And that's it. ( final image )
I forgot to mention, for most general purposes I just use a standard round brush. I also try and avoid using many layers, whenever possible. They can come in handy, if you know what you're doing, but generally too many layers just slow down the workflow. ( Or the computer itself, depending on your system. )
And that's about all I can think of, at this time... I tried to keep my comments fairly general, and non-Painter-specific, so hopefully users of other art software will be able to get something out of this. However, feel free to ask, if anyone should have more specific questions - Or in case I forgot something...
( P.S.: I'm afraid FA is going to downsize this one. If this ends up looking crappy, you can alternately give it a look over at my dA account instead. )
Category Artwork (Digital) / Portraits
Species Unspecified / Any
Size 404 x 1280px
File Size 104.8 kB
I'll join Noirtheater in thanking you for this. And I am especially thankful to you for not making your explantion Painter-specific. Yeah, I know that PhotoShop6 is clunky and out of date by comparison, but your text REALLY helps in providing me with clear goals to work towards with it.
Really big thanks, dasAoD!
Really big thanks, dasAoD!

 FA+
FA+


Comments