 FA+
FA+
2367
Views
Views
82
Favorites
Favorites
Category
All / Tutorials
Species Dragon (Other)
Size 800 x 5040
File Size 1.23 MB
Report this content
More from Dodoki


Listed in Folders


I recently learned how to do this trick. It's served me very well, so I figured I'd pass the process on to you guys.
There are all kinds of things that you can do with isolated lines, so have fun and explore!
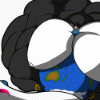
Lineart used to demonstrate was done by behemuffin! Hope you enjoy!
Also, it was suggested that people might want a sample PSD to fiddle with, in order to experience it firsthand. So here ya go.
There are all kinds of things that you can do with isolated lines, so have fun and explore!
Lineart used to demonstrate was done by
 behemuffin! Hope you enjoy!
Also, it was suggested that people might want a sample PSD to fiddle with, in order to experience it firsthand. So here ya go.
Category All / Tutorials
Species Dragon (Other)
Size 800 x 5040px
File Size 1.23 MB
Listed in Folders


This looks kind of interesting. My line art can never amount to this type of quality since I usually use GIMP and the only way I've ever been able to ink my outlines is by using a mouse by hand with the Paths tool...for every single line. And I lack the ability necessary to work with the Curves aspect of it, not to mention trying to ink anything in SAI confuses me to no end.
So...I dunno, this might look interesting to try something out on next time, perhaps...
So...I dunno, this might look interesting to try something out on next time, perhaps...

Man, I wish I could go back in time and give this to myself 10~ years ago. It seems an incredibly useful process for artists who don't do their work 100% digitally, but a difficult one to perform let alone find. This is thoughtfully presented and easy to understand. I was curious about the pointers you used, like the ones demonstrating the protected and sample colours, and how you made them. (I want to say "spoon-shaped" or "elongated magnifying glass shape" pointers, but... :V) They're a nice touch vs. arrows.
I've always used the Brightness and Contrast sliders to get a good contrast, but the Level options looks far more robust. I'll be giving those a try next time to see how they do with eliminating residual sketch marks, and any hard-to-see speckles which may later get picked up by Stroke, which happens surprisingly often when I scan stuff in, and the B/C sliders don't seem to catch a lot of them.
I attempted to replicate this process in Gimp, but it lacks a background eraser function. The next best option seems to be to adjust the levels, select the black areas, and copy them to a new layer. This probably explains it better than I could: http://www.howtogeek.com/113365/how.....ng-or-lineart/
Not quite as intuitive as your process, but it seems to be the sole option for extracting lines in that program.
:o I really want to do this sort of thing more often, its just a pain to do it in Sai. :| So I'll have to wangle it some way, maybe in the GIMP or hopefully there is a magical way to do it in Manga studios I don't know yet. D:
But the biggest lesson I take away from this is the how to make the line colour. Making it darker was something I figured but more saturated was not something I had known about.
But the biggest lesson I take away from this is the how to make the line colour. Making it darker was something I figured but more saturated was not something I had known about.
Comments