 FA+
FA+
839
Views
Views
18
Favorites
Favorites
Category
Artwork (Traditional) / General Furry Art
Species Dog (Other)
Size 299 x 1280
File Size 58.9 kB
Report this content
★
More from autumn_sunrise


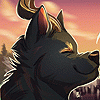
A bit of a tutorial, I s'pose...
Since a couple of you have asked...I scanned this while it was still in the works so you could see how I paint!! Firstly, let me mention...YOU SHOULD NEVER PAINT YOUR BACKGROUND LAST. I just wasn't sure if I wanted one or not when I started this, so...I ended up adding it in last minute. XD In general, it's a better rule to paint your background first because those colors will effect the the subject. Just wanted to toss that out there.
NOW...let me babble about this a little...
Step 1 - the sketch! Obviously! I know I was working with a 3" x 4.25" space, so I had it drawn out and sketched within that box. Thus...my collie girl! These pencil lines are exactly what I used...they were a bit lighter than this so the paint wouldn't pick up the graphite and make a big mess. ;)
Step 2 - Paint your base colors! I knew I was going with a blue merle collie, so I had references out and about. I like keeping my paint fairly watered down and layering it on in stages. Normally, after this, for strong lighting, I will block in the shadows as well, but since this piece was meant to be low lit, I added my shading in a bit at a time later...you'll see in the next couple of steps!
Step 3 - Added the merle spots! I did this with my small brush and made the little fur strokes! Also started shading on the tan parts of the face and legs.
Step 4 - More shading! Here, I used a darker version of the fur color, and added in short fur strokes where the shadows should be. I tried to keep my shading color darker than the fur, but lighter than the merle spots, for balance! ;) My light source is coming from the left, so my shadows should be towards the right hand side. Also mixed some pinks, blues, and greens to shade the white sections of the fur. If you look at ref pictures of white animals, you'll see how their surroundings effect the shaded areas of the fur.
Step 5 - decided to take ink to it and ink the outlines. I like doing this later in a painting, because, as gouache is opaque, it WILL paint over ink. So unless you want that effect, inking should come later, or you'll just have to reink it anyway!
Step 6 - the finish! Added more shadows using strokes with a small brush and (bad me!) painted in a background. One thing to note while painting fur is to keep in mind what direction it should be moving in. While adding in my shading, and especially when painting the dark merle spots, I kept this in mind because it can make or break an image. REF PHOTOS AND BOOKS ARE AWESOME THINGS...make use of them! I know I do! Also added in darker shadows under the collie to give her ground!
And that's that!! I hope this might help some of you...everybody has their own methods of working, but maybe mine may help you out some. Always fun to give a new technique a whirl. ;)
Category Artwork (Traditional) / General Furry Art
Species Dog (Other)
Size 299 x 1280px
File Size 58.9 kB

mrouf?
very nice. thank you for your time creating this little tut. I might not learn much from it (being reluctant to start with acrylics), but I can certainly try. :)
allow me to add that fur does not grow simply from up to down, bu8t in every possible direction, mostly to avoid rainwater from reaching certain parts of the body, like folds between legs and belly, genitals, nostrils, eyes, and so on. the best way to look it up are chestnut-coloured shorthair dogs and horses.

*chuckles* WHen you see the progress, it looks easy, but it's oh so hard when you're actually in the middle of a painting trying to make it happen!!! And watercolors and gouache are AWESOME mediums...they can take a while to learn how to handle correctly (you should've seen my sophomore watercolor work...AWFUL), but once you do, the outcome can really be fantastic!

Comments