 FA+
FA+
726
Views
Views
25
Favorites
Favorites
Category
All / Tutorials
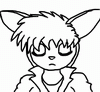
Species Wolf
Size 1280 x 826
File Size 630.8 kB
Report this content
More from Lachland-Nightingale


Listed in Folders


i had a request for a bit of info on the the gesture/line-of-action and construction drawing that nearly all animation and most comics and anthro artists use. This is quite rough, but should suffice as showing the stages.
Using for example here one of my poses of Fishbo's Meira that didn't make to the final cut.
1. One or two at most basic action lines that sum up the pose. Action lines are often s curves. They may follow one leg or arm or both. (i didn't actually draw this on paper in this example - i've been drawing long enough that i can visualize some of these stages on the paper without having to draw them).
2. Secondary action lines suggesting pose, hair,tail,costume; sometimes a background and/or frame is suggested as well. (This is as far as this pic actually got - with four or five alt pics, Fishbo and i chose the rough that became the Meira pic posted.)
3. A simple sort of stick-figure skeleton is then drawn; there are some different styles of these used by different artists - they all serve the same function; to clarify the pose and to start to measure the proportions of the limbs, torso,and head.
4. Construction drawing. Utilizing tapering tubes for limbs, balls for joints and skull, an oblong pentagon for the pelvis, and an oblong box or tablet shape for the chest; sometimes, for female characters, the chest shape might suggest breasts. Jaw and muzzle shapes are attached to the skull shape - there are usually centre lines and eye lines drawn in. Again, there a half a dozen or so different construct drawing styles in popular use. The point of construction drawing is to give the skeleton some 3D mass. One continues to measure: "Is this leg too short? Is this arm too long?".
5. Rough Pencil 1. Lighten-up previous stages with an kneaded-rubber eraser if working in real pencil; if working digitally turn down their opacity. Here we begin to flesh-out the construction drawing, which requires knowing a bit of anatomy - muscles (and how they flex), tendons, bones, cartilage, fat - the effects of action and gravity. Knowledge that one can gradually acquire.
6. Optional rough lighting/shadow stage. This is to give the pic more of a 3D feel. This helps with spotting any left-over mistakes and gives a better basis for stage 8.
7. Sketching in clothing, ornaments, props, etc etc . A knowledge of the seven basic fold types helps to make a more realistic picture.
8. Rough Pencil 2. Again erase or tun down opacity. Self-explanatory - refining the pencil more, heading for the final drawing.
9. Flip it. (Not Shown) Optional but strongly recommended: If drawing on paper turn your drawing over on a light board (use a window if you don't have one) - check and correct ant mistakes by drawing on the back of the paper - then flip the page and erase and add corrections. Digital; just use mirror image, etc. . Sometimes when we flip a drawing like this we notice new things - the eyes are crooked, or a nose or muzzle is crooked, etc etc.
10. Clean It Up. (Not Shown). This might be done with pencil, ink, markers, colours, etc etc etc. Any of these might be further modified digitally - adding colours, correcting mistakes, etc.
11. Gloat for a few minutes.
12. Groan as you realize you want to do much better than this.
Go back to step 1 and repeat.... ^_^
Seriously, if you really want to get better faster don't try to finish every drawing, and don't regard each started drawing as precious - just do stages 1 through 4 (sometimes 5) - over and over. At first it might take a while for each pose, but you'll soon be able to knock out 6 - 10 poses or so in a 30 -60 minute "warm-up" session. Then maybe choosing your favourite pose to take through the further stages.
At some point you might not have to do all these stages because you can do them in your head and visualize them on the paper; but for now diligent practice will make for better and better results.
Stage 2 was pencil 4x5 in. The rest is Krita.
Category All / Tutorials
Species Wolf
Size 1280 x 826px
File Size 630.8 kB


Comments