 FA+
FA+
531
Views
Views
11
Favorites
Favorites
Category
Cel Shading / Fantasy
Species Rabbit / Hare
Size 900 x 809
File Size 545.2 kB
Report this content
★
More from ByTheBook


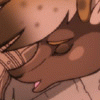
A panel from my saucy fantasy web comic- http://bythebook.smackjeeves.com
Category Cel Shading / Fantasy
Species Rabbit / Hare
Size 900 x 809px
File Size 545.2 kB


I did set up a streaming account but my computer's too old to handle it. I may start when I eventually swap over to my new computer (which I've been putting off because it's Windows 10-which doesn't seem to work very well with my scanner or any of my art programs) :)
Basically I cell shade and then add another layer over the top of the cell shaded art set to 'multiply'-which I fill with an appropriately toned colour (usually mid tone greyish with a slight tint). This adds what I call the 'shadow' layer and is used for ambient lighting and additional direct lighting effects. I select a lighter version of the shade I chose for this layer and highlight the objects quite loosely with an airbrush tool.
One I'm satisfied I will add some additional highlighting with the airbrush using other colours (eg-there is a green glow from a spell-so I'll use a very light green on this area-which casts a green hew on the surfaces nearby).
This 'shadow layer' can be darker or lighter depending on atmospheric conditions. Remember-this layer is applied over the top of all the other layers. The harsher cell shading has already been applied on another layer (also using a layer set to multiply, but using a normal brush and more deliberate lines. I also always use the same colours for this layer-which goes over the flat colours. I fill in with a mid tone and the highlight with a lighter version). I also add highlights over this to shiny stuff and any objects I feel could use the extra layer of highlighting to 'pop'. Metalic objects get two or even three levels of highlighting at this stage.
Once the shadow layer is done I save the image and then flatten it. I then duplicate layer and add a gaussian blur to the duplicate (6.3). I then set this layer to ' screen'. This will raise the brightness levels of the image a lot and it softens the black lines and the edges of the shadow areas to give a slightly blurred '80s animated' look
I then flatten this image and save it under a new name (I usually just add 'Word' to the name of the file as this will be the art that has dialogue added to it). This way the original art still exists under the other name-with all it's layers intact. This is important as editing a blurred image is almost impossible-so if you want to make changes later it's good to have the pre-flattened version available.
Hope that made sense. If not let me know and I'll do my best to explain further :) I may do a step by step guide at some point. I doubt people will want to copy my method exactly, but there may be techniques in it that can be used by others :)
Comments