 FA+
FA+
467
Views
Views
9
Favorites
Favorites
Category
Photography / All
Species Unspecified / Any
Size 1200 x 674
File Size 239.1 kB
Report this content
More from HDR


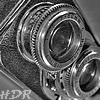
HDR or, High Dynamic Range, Is a way of producing a wider range of light in an image. This is done because the way the eye the brain see and record images is much more advanced than what monitors and printers are capable of displaying. You might notice how when you are in a location, you can see everything whether it is in a shadow or bathed in bright light. A display device or capture device, is not capable of seeing or reproducing all of this detail in one image.
HDR lets us cheat the system!
Basically, HDR requires that you take more than one image of the same thing. Each image is taken at a different exposure, usually +2, 0, -2. This will usually give a wide enough range of light.(1)
Once you have your images, You will need a program capable of compiling them into one image. Photoshop has a 'merge to HDR' tool and there are several free dedicated programs like qtpfsgui. If you want to go all out and pay for the good stuff, Photomatix Pro is the best there is.
Once you've chosen your images in your program (2), go ahead and generate the HDR image. This is done simply by clicking 'generate HDR' or something to that effect. There are other options you can tweak before that but to start just leave them at their default. After your computer sweats a bit, you will get an image that looks like screen 3. It's an HDR image alright, but it NEEDS to be tone mapped. That's where the fun begins.
Tone mapping is the process of combining color and light ranges into a contrast range the display device or printer can reproduce while still keeping all the image detail. This is where you cheat the technology. This is also where the art begins and the science ends. You can do whatever you want here. From simple contrast reduction to radical tone mapping that makes your image look like an acid trip. The only way to know what all the sliders do and what looks good, is to play with it. Once you've got something you like, process it and save! You're done!
That's the basics of it. There is a whole world of things you can do using HDR techniques, so get out there with your cameras and show us what you can do!
Category Photography / All
Species Unspecified / Any
Size 1200 x 674px
File Size 239.1 kB


my more generalized tutorial http://biozz.deviantart.com/#/d31ahz8
but i do use some expensive tools
but i do use some expensive tools

Comments