 FA+
FA+
821
Views
Views
8
Favorites
Favorites
Category
Artwork (Traditional) / Fursuit
Species Cervine (Other)
Size 995 x 2640
File Size 2.68 MB
Report this content
More from Ataraxis_Fursuits


Deer Partial Construction Pictures
First off, the promised link: Completed Mask
As I mentioned in the comments at the start of the document, these are all of the pictures I have of the construction of my Tiber deer partial mask. Unfortunately, this means that I have no photographs of the mask between foaming and furring. My documentation on this wasn’t great, but it will have to do.
So, in place of photographs, here’s an in-depth description of what I did. This next bit can probably be TLDR’ed unless you’re curious.
THE CONCEPT
I wanted a partial mask that would be very light and nonrestrictive, so that I could wear it while acting as a handler. I chose to go with a combination of a mask that covers my face and an ear-hat, partly because it would be simple, and partly because I had never seen one before, and I thought it would be cool.
THE EAR HAT
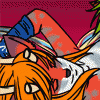
The ear hat had to be made first, for fitting reasons that I’ll go into later. The hat itself consisted of a single piece of fabric, which was patterned as a long strip with four of the lower rounded/pointy patterns laid out side to side along the top. The ears are each made of two pieces of fabric, a brown ear with a black liner. Which pattern is which is identified in the picture. (Note: I’m trying to keep the artist comments to a reasonable length, so I’m cutting some stuff out. If anybody would like more details, ask, and I’ll spell it out in a reply below.)
THE UNDER STRUCTURE
The structure consists of 3 basic parts: the tan splinting material, which provides a comfortable fit; the metal bar-stock, which provide structure to the thin antlers, and the metal plate, which provides a solid connection between the antlers and the rest of the face.
The Splint:
The splinting material is called Thermoplast, and I obtained it from a relative who works in the medical industry. (A web search for Thermoplastic Splinting Material will turn up similar products.) The Thermoplast becomes very soft, almost putty-like, when heated using a hot water bath, so the basic pattern was cut out, heated, and shaped to my face. I was wearing the hat when this was done (that’s the fitting step I mentioned), so the mask conforms perfectly to my face over the hat.
The Antlers:
The antlers were constructed from thin mild steel bar-stock , about ¼” in diameter. I’m fortunate enough to own an arc welder, the holy grail of hobby tools, so I cut each individual section to length and spot welded them together. These were then welded onto the plate over the forehead.
The Plate:
The metal plate was formed from 12 gauge mild steel sheet metal, which is ridiculously thick, but about what you need if you want to weld onto it (at least using my tools). The plate was formed over a short section of railroad rail with a ball-pien hammer. Again, I’d be happy to discuss methods for this, but metalworking is a topic for another essay. Ask if you’re interested. Anyway, once the plate was formed, the antlers were welded to it, and holes were drilled in both the thermoplast and the sheet metal for riveting. I used nails which I cut short for the rivets, which are a much more permanent solution than the rather flimsy pop rivets you can purchase from hardware stores.
Note: From here on out, you may want to look at the finished mask to actually see what I’m talking about. Here’s the link again: Completed Mask
FOAMING
Once the understructure was completed, I foamed the mask with patterned pieces of upholstery foam. One piece defines the brow ridge; one piece defines each cheek, and the two cheek pieces sweep forward and come together to form the main snout; one piece was added to each side of the snout to flesh it out; and one piece was added along the top of the snout to create better flow to the brow. The foam was carved with a razor blade to give it the right shape.
The antlers are also upholstery foam. I cut strips about 2.5” wide and the length of the section I was foaming. I taped the side of the foam to the bar-stock, and wrapped the foam into a tight coil. I then taped around the whole piece, compressing the foam into the nice cylinders on the final mask. The tape is actually the final finish. I used Gaffers tape, which works great, looks great, and costs an arm and a leg.
FURRING
I used a very short pile fur I found at my local fabric store. It was plain white acrylic fur, not too expensive. I don’t think it’s great quality, but it feels nice enough, and it was what I could get in the time constraints. I attached each piece with fabric glue- I’d use hot glue in the future. Many people have written much better tutorials than I could on furring a mask, so I won’t go into it much.
’AIRBRUSHING’
Yeah… I don’t actually own an airbrush. But I do have acrylic ink lying around. So, I mixed up a large batch of the color I wanted, and rubbed it into the fur with my finger. The result was actually a lot better than I could have foreseen, although I should have used more paint. The technique works, though.
THE NOSE
The nose is black Sculpey, glued on top of the fur. I would have liked to get a better fit to the mask, but it works. Not much more too it. ^^
Anyway, there’s my wall of text. =P
Hopefully some of it was helpful, or at least interesting. If you have any questions or critiques, I’d be happy to hear them!
First off, the promised link: Completed Mask
As I mentioned in the comments at the start of the document, these are all of the pictures I have of the construction of my Tiber deer partial mask. Unfortunately, this means that I have no photographs of the mask between foaming and furring. My documentation on this wasn’t great, but it will have to do.
So, in place of photographs, here’s an in-depth description of what I did. This next bit can probably be TLDR’ed unless you’re curious.
THE CONCEPT
I wanted a partial mask that would be very light and nonrestrictive, so that I could wear it while acting as a handler. I chose to go with a combination of a mask that covers my face and an ear-hat, partly because it would be simple, and partly because I had never seen one before, and I thought it would be cool.
THE EAR HAT
The ear hat had to be made first, for fitting reasons that I’ll go into later. The hat itself consisted of a single piece of fabric, which was patterned as a long strip with four of the lower rounded/pointy patterns laid out side to side along the top. The ears are each made of two pieces of fabric, a brown ear with a black liner. Which pattern is which is identified in the picture. (Note: I’m trying to keep the artist comments to a reasonable length, so I’m cutting some stuff out. If anybody would like more details, ask, and I’ll spell it out in a reply below.)
THE UNDER STRUCTURE
The structure consists of 3 basic parts: the tan splinting material, which provides a comfortable fit; the metal bar-stock, which provide structure to the thin antlers, and the metal plate, which provides a solid connection between the antlers and the rest of the face.
The Splint:
The splinting material is called Thermoplast, and I obtained it from a relative who works in the medical industry. (A web search for Thermoplastic Splinting Material will turn up similar products.) The Thermoplast becomes very soft, almost putty-like, when heated using a hot water bath, so the basic pattern was cut out, heated, and shaped to my face. I was wearing the hat when this was done (that’s the fitting step I mentioned), so the mask conforms perfectly to my face over the hat.
The Antlers:
The antlers were constructed from thin mild steel bar-stock , about ¼” in diameter. I’m fortunate enough to own an arc welder, the holy grail of hobby tools, so I cut each individual section to length and spot welded them together. These were then welded onto the plate over the forehead.
The Plate:
The metal plate was formed from 12 gauge mild steel sheet metal, which is ridiculously thick, but about what you need if you want to weld onto it (at least using my tools). The plate was formed over a short section of railroad rail with a ball-pien hammer. Again, I’d be happy to discuss methods for this, but metalworking is a topic for another essay. Ask if you’re interested. Anyway, once the plate was formed, the antlers were welded to it, and holes were drilled in both the thermoplast and the sheet metal for riveting. I used nails which I cut short for the rivets, which are a much more permanent solution than the rather flimsy pop rivets you can purchase from hardware stores.
Note: From here on out, you may want to look at the finished mask to actually see what I’m talking about. Here’s the link again: Completed Mask
FOAMING
Once the understructure was completed, I foamed the mask with patterned pieces of upholstery foam. One piece defines the brow ridge; one piece defines each cheek, and the two cheek pieces sweep forward and come together to form the main snout; one piece was added to each side of the snout to flesh it out; and one piece was added along the top of the snout to create better flow to the brow. The foam was carved with a razor blade to give it the right shape.
The antlers are also upholstery foam. I cut strips about 2.5” wide and the length of the section I was foaming. I taped the side of the foam to the bar-stock, and wrapped the foam into a tight coil. I then taped around the whole piece, compressing the foam into the nice cylinders on the final mask. The tape is actually the final finish. I used Gaffers tape, which works great, looks great, and costs an arm and a leg.
FURRING
I used a very short pile fur I found at my local fabric store. It was plain white acrylic fur, not too expensive. I don’t think it’s great quality, but it feels nice enough, and it was what I could get in the time constraints. I attached each piece with fabric glue- I’d use hot glue in the future. Many people have written much better tutorials than I could on furring a mask, so I won’t go into it much.
’AIRBRUSHING’
Yeah… I don’t actually own an airbrush. But I do have acrylic ink lying around. So, I mixed up a large batch of the color I wanted, and rubbed it into the fur with my finger. The result was actually a lot better than I could have foreseen, although I should have used more paint. The technique works, though.
THE NOSE
The nose is black Sculpey, glued on top of the fur. I would have liked to get a better fit to the mask, but it works. Not much more too it. ^^
Anyway, there’s my wall of text. =P
Hopefully some of it was helpful, or at least interesting. If you have any questions or critiques, I’d be happy to hear them!
Category Artwork (Traditional) / Fursuit
Species Cervine (Other)
Size 995 x 2640px
File Size 2.68 MB
Well, to be fair, the week didn't include the failed attempts or the gathering of materials. By the time I sat down and started on what was to become the finished mask, I had worked out most of the kinks in the design, so I knew exactly what I needed to do and how I was going to do it. Also, between this and finishing up the Dona werewolf costume, I was working straight 15 hour days.
Actually, I don't know how I finished it in a week either. ^^;
Actually, I don't know how I finished it in a week either. ^^;
Comments