 FA+
FA+
161
Views
Views
7
Favorites
Favorites
Category
Artwork (Digital) / Miscellaneous
Species Taur (Other)
Size 1024 x 1024
File Size 889.3 kB
Report this content
More from Chakat_Blackwater
")
")
")
")
")


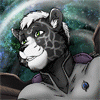
I thought I'd show a behind the scene of sorts of my last image and how I constructed the stage as it were. This is what it looks like zoomed out. The normal base plate is hidden under the road about where the characters are standing, I've used a rectangular shield to make to road surface, as well as for the background sky, I use the stain decals on both to create the clouds and dust stains on the road, the grass in the background is a flag which I've moved almost out of frame to create the grass and horizon line. The trees in the planter were easy enough to create, just two dead fir trees which I enlarged and then I used some other trees to create the foliage by turning them horizontal. The trees and sky background are outside of the building area, I managed to get those outsid of it by snapping all those parts to the road plate and then carefully sliding it outside the border to create some more depth. The wall is just a flattened square block, with a few censor bars to suggest a brick wall. (A trick often used in comics to suggest a brick wall without actually having to draw every brick) another shield to suggest a street name sign to finish the look. The trashcan is just that, a trashcan which I flattened a bit, placed a pole behind it and then flipped a bowl upside down to create the cover, purposely made a bit too mall to make it look like there's some more distance.
I usually plan the angle of the capture shot in advance so I can save some parts by only adding decorations on characters or setpieces which are going to be visible, so sometimes I do not have one side of a character fully modeled so to speak, or I may remove some parts later and change the capture angle a little to hide those changes. It's a lot better now that there's no 20 parts limit but a percentage limit instead. Most parts count for 5% and some smaller parts only count for 1% even if enlraged so this makes it more of a balancing game but I can at least add some more parts, and technically I can go over the limit a little if I'm at 98% and I add a 5% part, so that's nice from the hero forge people to allow instead of being super strict about it.
I think that's about all I got to say about this, but if there's any more questions, ask away.
Also do let me know if you'd like to see more of these behind the scenes or if you rather don't if it takes away anything from the end result for you. Also if you want to see any older, or future images behind the scene and which ones, and if you'd like to know some of the tricks I've used... I'm no expert on Hero Forge but I don't mind sharing how I work with it.
Made in Hero Forge
Characters belong to me chakat_blackwater
I usually plan the angle of the capture shot in advance so I can save some parts by only adding decorations on characters or setpieces which are going to be visible, so sometimes I do not have one side of a character fully modeled so to speak, or I may remove some parts later and change the capture angle a little to hide those changes. It's a lot better now that there's no 20 parts limit but a percentage limit instead. Most parts count for 5% and some smaller parts only count for 1% even if enlraged so this makes it more of a balancing game but I can at least add some more parts, and technically I can go over the limit a little if I'm at 98% and I add a 5% part, so that's nice from the hero forge people to allow instead of being super strict about it.
I think that's about all I got to say about this, but if there's any more questions, ask away.
Also do let me know if you'd like to see more of these behind the scenes or if you rather don't if it takes away anything from the end result for you. Also if you want to see any older, or future images behind the scene and which ones, and if you'd like to know some of the tricks I've used... I'm no expert on Hero Forge but I don't mind sharing how I work with it.
Made in Hero Forge
Characters belong to me
 chakat_blackwater
Category Artwork (Digital) / Miscellaneous
Species Taur (Other)
Size 1024 x 1024px
File Size 889.3 kB
Comments