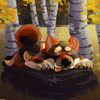
I thought it would be sort of cool to show the comparison between the sketch and the finished product for one of my cut paper badges. :3 I'll scrap this later.
1. First thing I do is sketch out what I the finished product to generally look like. More often than not, I'll also quickly ink the sketch to help for when I transfer the shapes to the final paper. If it's a particularly complex design (or if I'm having a "blonde day"), I'll ink in different colors so I can keep the colors/shapes in order.
2. Since I've been doing this for a while, I pretty much know how I'm going to want to put this thing together and how I'll need to cut each shape to accomplish my vision. Some designs need a lot more forethought than others to figure out. With cut paper, the shapes, colors, and how you stack them can make a huge difference in the final product. Immy here used six different colors of paper; two whites, two blues, the yellow, and the reddish orange. It really helps to get all the colors of paper you want to use picked out and set aside ahead of time.
3. I can usually use a light box (aka my work room window with the sun shining through it) to trace most of the shapes onto the paper to cut out. Unfortunately, most of my paper is very thick and won't allow for that, so I end up just sighting the shapes onto the paper. :3 For example, on this one... the yellow and orange paper was all too thick for me to trace and all of those bits had to be guesstimated.
4. Once I get all the shapes cut out, I start gluing everything together! With any luck the final product is pretty close to the original sketch! :3 I've gotten a lot better through trial and error, but there are still times where the whole thing needs to be scrapped and I need to just try it again. @.@ There have been some badges (usually of the more complex characters) where I get the body done fairly fast, but I have to try several times with the head/face before I get something I find acceptable and that's always frustrating.
This one ended up really close to the original sketch on the first try so I was really please with it. :3 It's very satisfying, to me, when I can lay the final product over the original sketch and everything lines up mostly the same.
Category Artwork (Traditional) / Tutorials
Species Bat
Size 900 x 668px
File Size 190.7 kB

 FA+
FA+


Comments