 FA+
FA+

Ghostbustin' for The sake of it? [Stage 4]
13 years ago
General
OHH KAYY then.
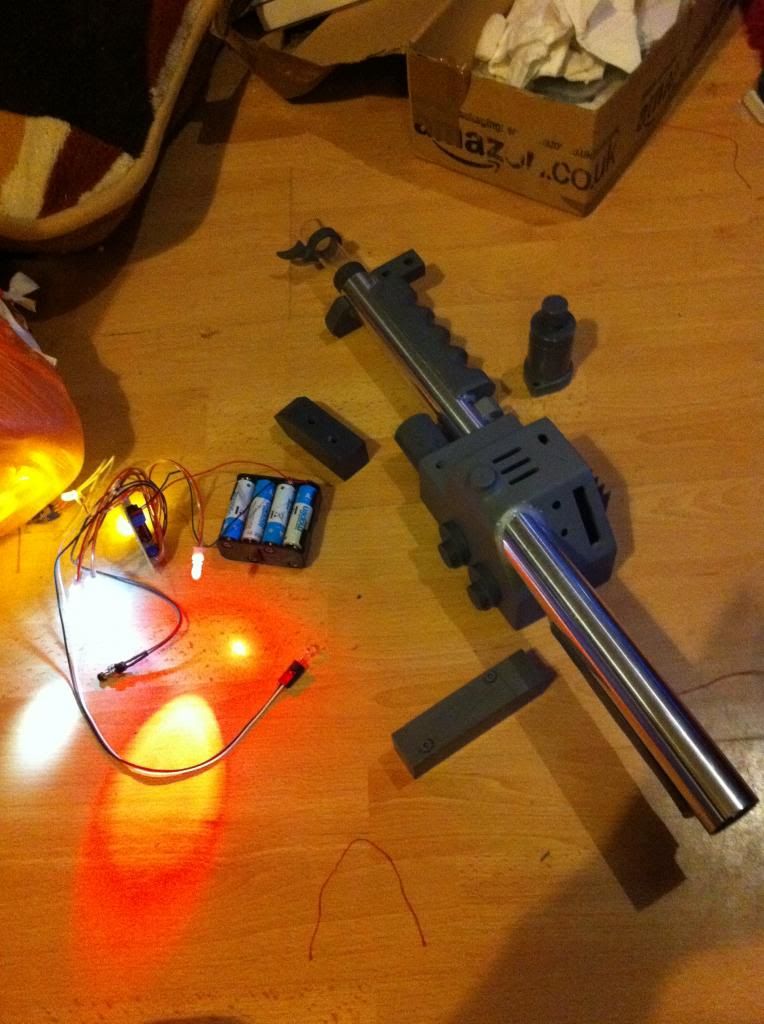
So I missed the spooky time of the year. It matters not, the uniform alone turned heads at work. But now is the time to move on to completing the pack and wand. firstly I've taken the wand kit bought from Nick-A-Tron props and assembled it.
http://i225.photobucket.com/albums/.....ps0f11d8e8.jpg
A few hours of painting and waiting and we have this..
http://i225.photobucket.com/albums/.....ps1cfae427.jpg
http://i225.photobucket.com/albums/.....psbba1f22f.jpg
Adding more and more painted parts...
http://i225.photobucket.com/albums/.....ps9450cb61.jpg
http://i225.photobucket.com/albums/.....psc4e27aed.jpg
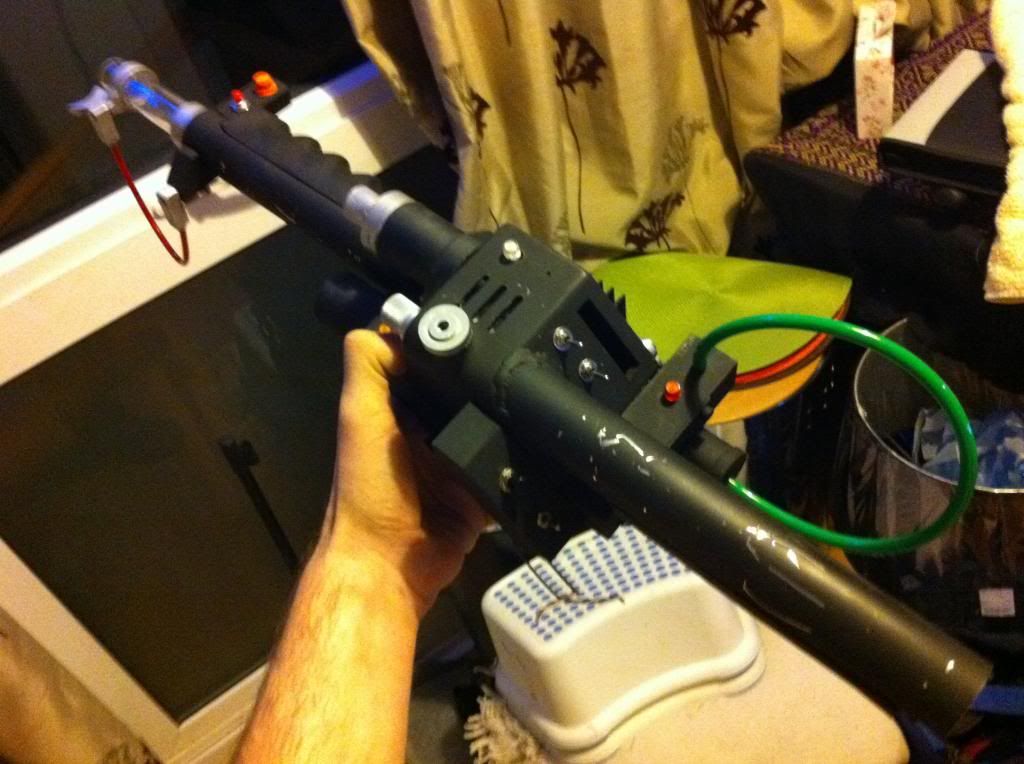
Finally Stickers and hose...
http://i225.photobucket.com/albums/.....ps8c82ee93.jpg
http://i225.photobucket.com/albums/.....ps8cddcc0b.jpg
Now then... Electronics...
Here's a test video of the electronics kit for both the pack and wand...
http://www.youtube.com/watch?v=f6Yr7z5KILk
I started by sticking the main pack lights in roughly and testing what they might look like. it's starting to go well..
http://i225.photobucket.com/albums/.....psb3ecaa61.jpg
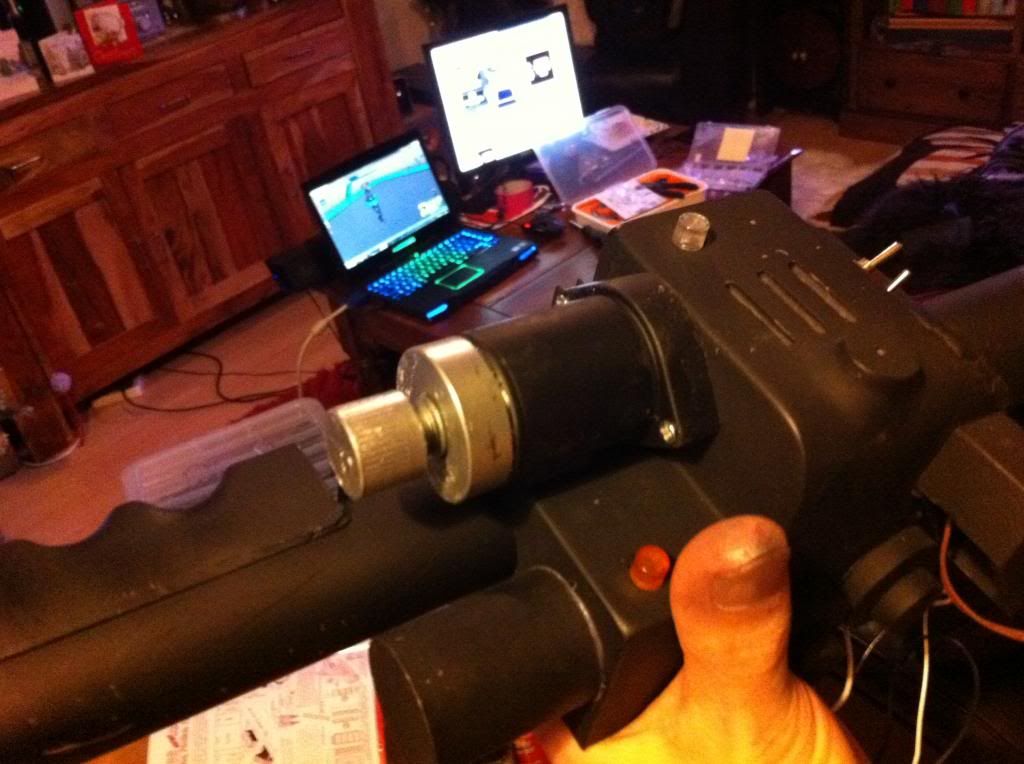
so knowing that it looks ok I get back to the wand itself.
http://i225.photobucket.com/albums/.....ps3d3cf770.jpg
I decided to use 1.5mm 4 core flex to bring power and sound the the switches here. it's a complete mess. Using a continuity test on my electrician's mate the voltage meter I tested each circuit from switch to switch making sure sound tracks did not mix with power tracks. that would be lethal to the sound board...
YAY most of it finally installed! well everything except the yellow power bar. Still need to hookup the power tracks for it before it goes in.
http://i225.photobucket.com/albums/.....ps3fcbaae9.jpg
Power lines now installed and the sound cables set in place. I put the last of the kit together and took a short video.
http://www.youtube.com/watch?v=mdARoB-GVqk
==============================================================
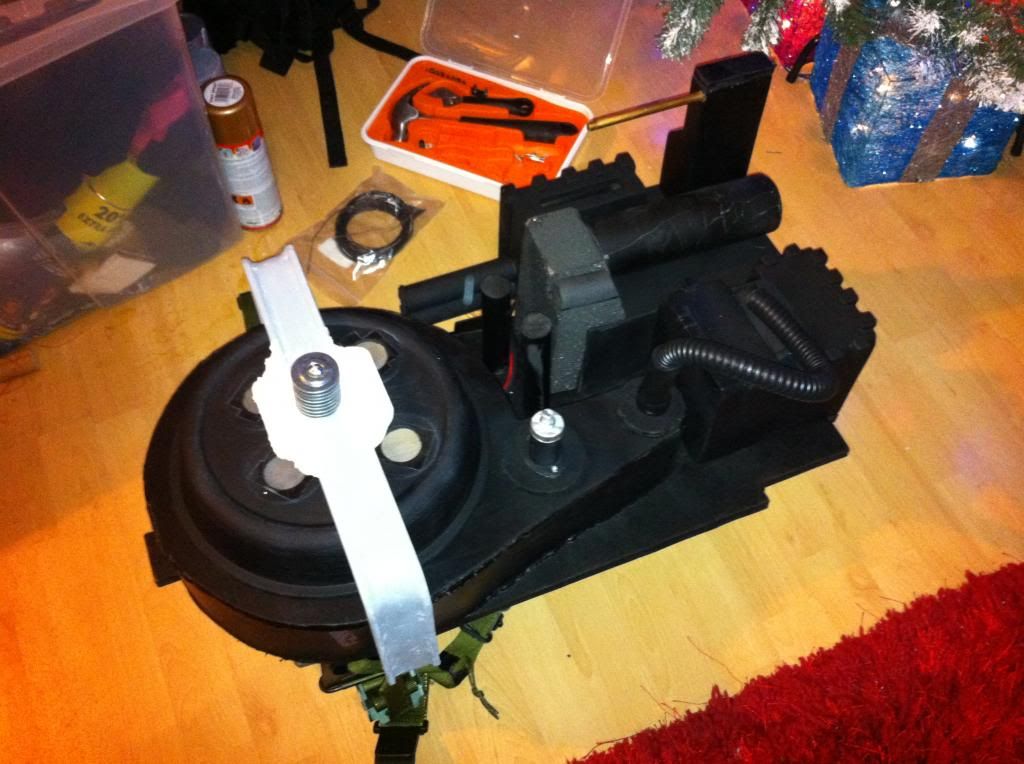
NOW with that done time to put a bit more into the main pack. I started by giving the main parts and backing new coats of paint, adding a new style vacuum line hose and adding some extra parts...
http://i225.photobucket.com/albums/.....ps181a2a47.jpg
http://i225.photobucket.com/albums/.....psda8fa999.jpg
After a few further tweaks and bolts I've ended the night's build with this...
http://i225.photobucket.com/albums/.....ps3271c366.jpg
So I missed the spooky time of the year. It matters not, the uniform alone turned heads at work. But now is the time to move on to completing the pack and wand. firstly I've taken the wand kit bought from Nick-A-Tron props and assembled it.
http://i225.photobucket.com/albums/.....ps0f11d8e8.jpg
A few hours of painting and waiting and we have this..
http://i225.photobucket.com/albums/.....ps1cfae427.jpg
http://i225.photobucket.com/albums/.....psbba1f22f.jpg
Adding more and more painted parts...
http://i225.photobucket.com/albums/.....ps9450cb61.jpg
http://i225.photobucket.com/albums/.....psc4e27aed.jpg
Finally Stickers and hose...
http://i225.photobucket.com/albums/.....ps8c82ee93.jpg
http://i225.photobucket.com/albums/.....ps8cddcc0b.jpg
Now then... Electronics...
Here's a test video of the electronics kit for both the pack and wand...
http://www.youtube.com/watch?v=f6Yr7z5KILk
I started by sticking the main pack lights in roughly and testing what they might look like. it's starting to go well..
http://i225.photobucket.com/albums/.....psb3ecaa61.jpg
so knowing that it looks ok I get back to the wand itself.
http://i225.photobucket.com/albums/.....ps3d3cf770.jpg
I decided to use 1.5mm 4 core flex to bring power and sound the the switches here. it's a complete mess. Using a continuity test on my electrician's mate the voltage meter I tested each circuit from switch to switch making sure sound tracks did not mix with power tracks. that would be lethal to the sound board...
YAY most of it finally installed! well everything except the yellow power bar. Still need to hookup the power tracks for it before it goes in.
http://i225.photobucket.com/albums/.....ps3fcbaae9.jpg
Power lines now installed and the sound cables set in place. I put the last of the kit together and took a short video.
http://www.youtube.com/watch?v=mdARoB-GVqk
==============================================================
NOW with that done time to put a bit more into the main pack. I started by giving the main parts and backing new coats of paint, adding a new style vacuum line hose and adding some extra parts...
http://i225.photobucket.com/albums/.....ps181a2a47.jpg
http://i225.photobucket.com/albums/.....psda8fa999.jpg
After a few further tweaks and bolts I've ended the night's build with this...
http://i225.photobucket.com/albums/.....ps3271c366.jpg